")

Two Weeks to Whiter Teeth? My Honest Review of Smilebite
Here’s What Really Happens When You Try Smilebite Home Bleaching – No Filters, No Fluff

By
Hollywood Glow or Just Hype?
Confession: I am a hardcore coffee addict, love my dark teas, and have zero self-control at wine tastings. My dentist knows it, Instagram knows it—and honestly, I see it every time I smile. But that perfectly white, Instagram-worthy smile? Not happening… at least, not until now.
When I heard about the Smilebite Light & Bright kit—a home whitening set that’s topped a bunch of “best of” lists—I just had to see for myself. And I’m here to spill the unfiltered tea.
What Exactly Does Smilebite Light & Bright Promise?
In a nutshell: Whiter, prettier teeth. Results you can see in 7 to 14 days—without the horror-story sensitivity that most of us (myself included) dread with at-home whitening.
Compared to those slightly questionable TikTok miracle gels promising instant results, Smilebite actually has real science behind it. Its hero ingredient is PAP (phthalimidoperoxycaproic acid), which has been researched and—according to several studies—comes off way less harsh than hydrogen peroxide. The claim: visibly whiter teeth, no pain, no damage.
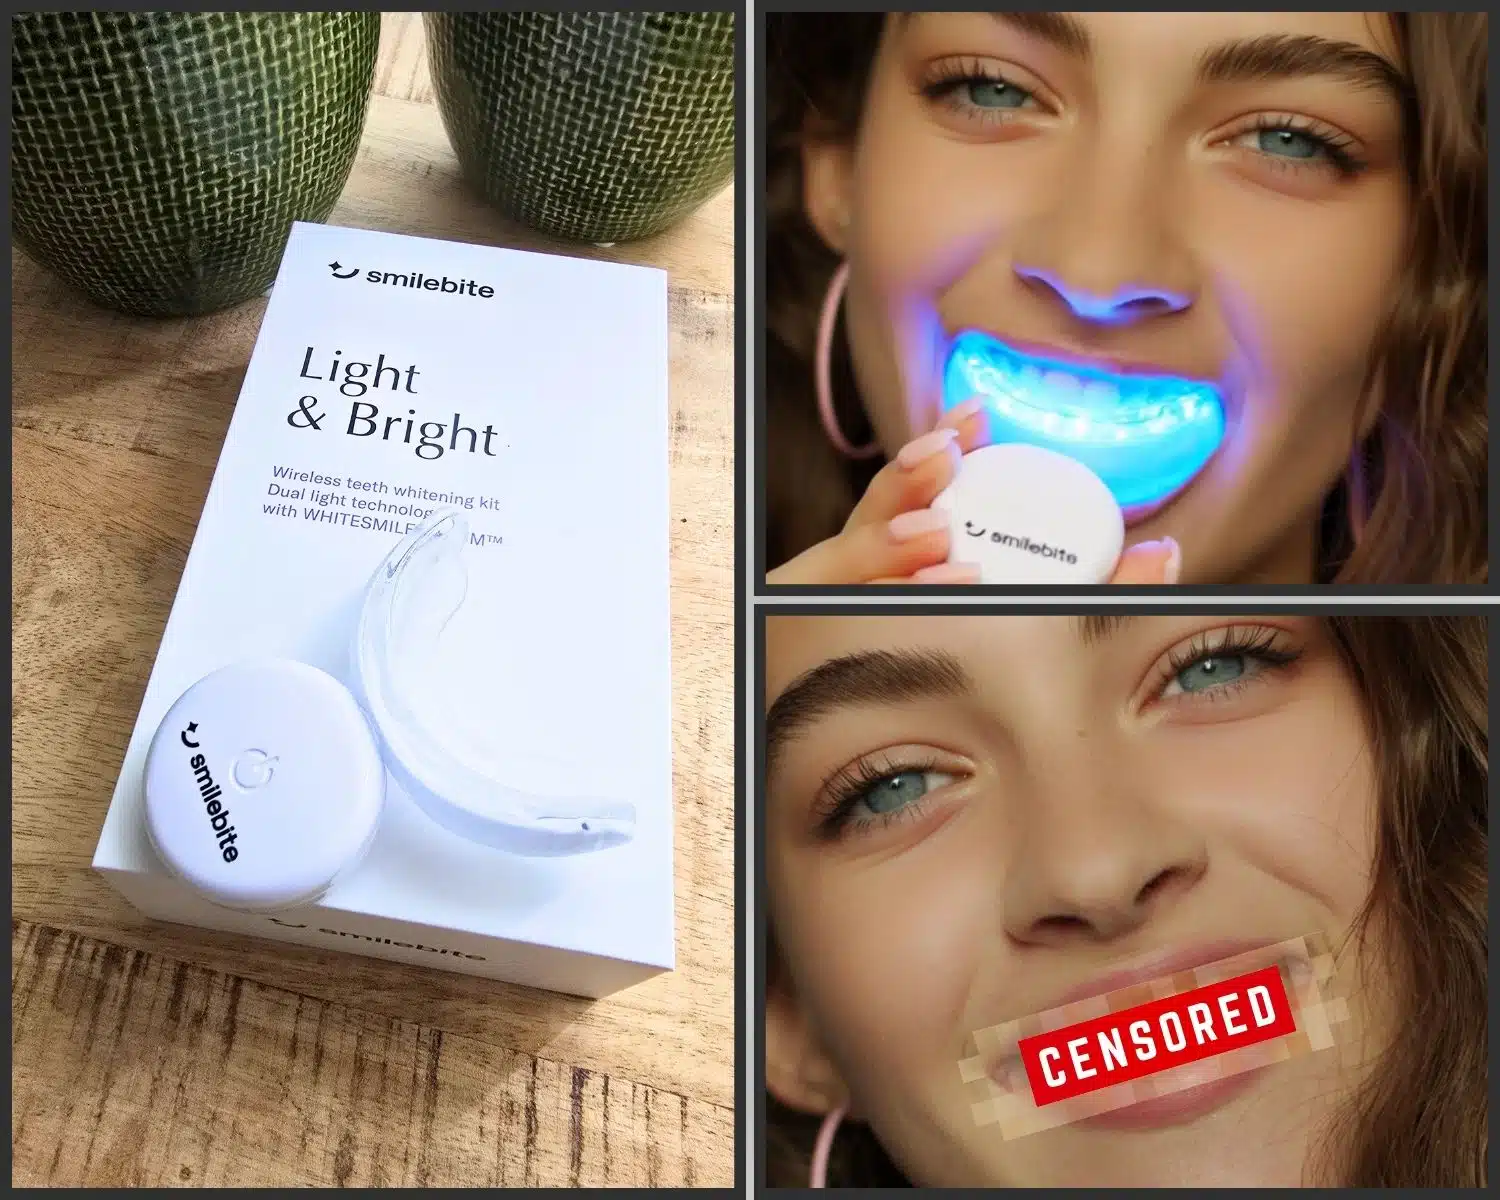
First Impressions—Does Whitening at Home Really Work?
Unboxing score: solid 9/10. The packaging is super minimal, stylish, and luxe. The LED mouth tray is compact, wireless, and ultra-lightweight.

My favorite part? The gel pen works just like a concealer—so you can get it exactly where you want. No messy drips, no gel all over your gums, zero hassle.
The instructions? Totally fine—could’ve used a bit more of an Insta vibe, but hey, at least everything’s clearly explained.
The Process: My Own Whitening Bootcamp
- Step 1: Brush with water only (no toothpaste!) and rinse well.
- Step 2: Pat your teeth dry (yes, you’ll feel like a dentist with a tissue, but trust—this step matters).
- Step 3: Paint on a super-thin layer of the whitening gel with the pen—just on your teeth, not your gums. (Trust me, your smile and your wallet will thank you.)
- Step 4: Pop in the LED tray, hit the button, and chill for 15 minutes. Perfect time to blast some tunes or sneak in a “Gossip Girl” episode.
Rinse your mouth, clean the tray, done.
I stuck with it: once a day, every single day for 14 days—no skipping (my Netflix history is proof if you need receipts).
Any Pain? Sore Gums? Actually, Everything Was Smooth Sailing
This was my biggest fear. Flashback: those whitening strips I tried years ago left my gums screaming with sensitivity after five minutes.
Smilebite, though? Honest truth—absolutely zero burning, no weird tingling, my enamel felt… normal. Is it the hydroxyapatite as a protective shield? Either way, I’m here for it.
So, What About the Actual Results—Is It Worth It?
Drumroll, please: By Day 5, my teeth looked fresher and brighter. Not exaggerating—my boyfriend (notorious for calling it like it is) even asked if I’d had something “done.”
By Day 14, I could definitely see a real difference: at least 5–6 shades whiter (I don’t own a fancy chart, so this is very much a personal take). Coffee stains? Seriously faded. Overall glow? Oh, absolutely.

Are my teeth “Hollywood white”? Nope—and honestly, I actually love that. They look naturally brighter and way more polished, but not so bleached that people think I went to Dr. Instagram.
One thing I really appreciate: The color’s even; no splotchy patches, no weird yellow edges like I got with cheapo strips before. The vibe is more “sparkling clean” than “over-bleached.”
The Verdict: What I Loved (And What I Didn’t)
Pros:
- Super easy, mess-free application
- The tray is comfortable, and the light switches off at exactly 15 minutes
- Zero sensitivity or pain (even with my extra-sensitive teeth!)
- Price is fair—especially since you get multiple uses
- Refill gel is cheap and easy to order later
Cons:
- The starter kit doesn’t have enough gel for multiple rounds—you’ll need refills if you want to keep going
- The tray is sturdy on the outside, but a pain to clean inside—so wash it well after every use
- The flavor is neutral; could be a touch fresher, honestly
One more tip: During the whitening phase, avoid cola, strong black tea, or curries. And if you can, take it easy on the coffee (your caffeine tolerance might thank you, too).
Smilebite Light & Bright – The Final Glow
Would I buy it again? Yes. Would I recommend it to my bestie? Totally—but with the honest heads up: Your teeth won’t turn “porcelain white” overnight. Patience pays off!
For me, Smilebite Light & Bright is perfect for anyone who wants a realistic at-home whitening that feels natural and never fake. No sensitivity, no risky chemicals, no dentist-level price tag. Coffee is still in my life, but now my smile’s noticeably brighter.
My bottom line: Real glow, not fake snow! Smilebite isn’t Photoshop, but it’s my new secret weapon for genuinely white, healthy-looking teeth.

